Getting started
Installation
Qiskit supports Python 3.6 or later. However, both Python and Qiskit are evolving ecosystems, and sometimes when new releases occur in one or the other, there can be problems with compatibility.
We recommend installing Anaconda, a cross-platform Python distribution for scientific computing. Jupyter, included in Anaconda, is recommended for interacting with Qiskit.
Qiskit is tested and supported on the following 64-bit systems:
Ubuntu 16.04 or later
macOS 10.12.6 or later
Windows 7 or later
We recommend using Python virtual environments to cleanly separate Qiskit from other applications and improve your experience.
The simplest way to use environments is by using the conda command,
included with Anaconda. A Conda environment allows you to specify a specific
version of Python and set of libraries. Open a terminal window in the directory
where you want to work.
It is preferred that you use Anaconda prompt installed with the Anaconda. All you have to do is create a virtual environment inside Anaconda and activate the environment. These commands can be run in Anaconda prompt irrespective of Windows or Linux machine.
Create a minimal environment with only Python installed in it.
conda create -n ENV_NAME python=3
Activate your new environment.
conda activate ENV_NAME
Next, install the Qiskit package.
pip install qiskit
If the packages were installed correctly, you can run conda list to see the active
packages in your virtual environment.
If you intend to use visualization functionality or Jupyter notebooks it is
recommended to install Qiskit with the extra visualization support:
pip install qiskit[visualization]
It is worth pointing out that if you’re a zsh user (which is the default shell on newer
versions of macOS), you’ll need to put qiskit[visualization] in quotes:
pip install 'qiskit[visualization]'
The following cloud vendors have Qiskit pre-installed in their environments:
IBM Quantum Lab
Build quantum applications and experiments with Qiskit in a cloud programming environment.
Strangeworks
A platform that enables users and organizations to easily apply quantum computing to their most pressing problems and research.
Installing the elements from source allows you to access the most recently updated version of Qiskit instead of using the version in the Python Package Index (PyPI) repository. This will give you the ability to inspect and extend the latest version of the Qiskit code more efficiently.
When installing the elements and components from source, by default their
development version (which corresponds to the master git branch) will
be used, as opposed to the stable version (which contains the same codebase
as the published pip packages). Since the development versions of an
element or component usually include new features and changes, they generally
require using the development version of the rest of the items as well.
The Terra and Aer packages both require a compiler to build from source before you can install. Ignis, Aqua, and the IBM Quantum Provider backend do not require a compiler.
Installing elements from source requires the following order of installation to
prevent installing versions of elements that may be lower than those desired if the
pip version is behind the source versions:
qiskit-ibmq-provider (if you want to connect to the IBM Quantum devices or online simulator)
To work with several components and elements simultaneously, use the following steps for each element.
Note
Due to the use of namespace packaging in Python, care must be taken in how you
install packages. If you’re planning to install any element from source, do not
use the qiskit meta-package. Also, follow this guide and use a separate virtual
environment for development. If you do choose to mix an existing installation
with your development, refer to
https://github.com/pypa/sample-namespace-packages/blob/master/table.md
for the set of combinations of installation methods that work together.
Set up the Virtual Development Environment
conda create -y -n QiskitDevenv python=3
conda activate QiskitDevenv
Installing Terra from Source
Installing from source requires that you have a C++ compiler on your system that supports C++11.
On most Linux platforms, the necessary GCC compiler is already installed.
If you use macOS, you can install the Clang compiler by installing XCode. Check if you have XCode and Clang installed by opening a terminal window and entering the following.
clang --version
Install XCode and Clang by using the following command.
xcode-select --install
On Windows, it is easiest to install the Visual C++ compiler from the Build Tools for Visual Studio 2019. You can instead install Visual Studio version 2015 or 2017, making sure to select the options for installing the C++ compiler.
Once the compilers are installed, you are ready to install Qiskit Terra.
Clone the Terra repository.
git clone https://github.com/Qiskit/qiskit-terra.git
Cloning the repository creates a local folder called
qiskit-terra.cd qiskit-terraInstall the Python requirements libraries from your
qiskit-terradirectory.pip install cython
If you want to run tests or linting checks, install the developer requirements.
pip install -r requirements-dev.txt
Install
qiskit-terra.pip install .
If you want to install it in editable mode, meaning that code changes to the project don’t require a reinstall to be applied, you can do this with:
pip install -e .
You can then run the code examples after installing Terra. You can run the example with the following command.
python examples/python/using_qiskit_terra_level_0.py
Note
If you do not intend to install any other components, qiskit-terra will
emit a RuntimeWarning warning that both qiskit-aer and
qiskit-ibmq-provider are not installed. This is done because
users commonly intend to use the additional elements,
but do not realize they are not installed, or that the installation
of either Aer or the IBM Quantum Provider failed for some reason. If you wish
to suppress these warnings, add:
import warnings
warnings.filterwarnings('ignore', category=RuntimeWarning,
                        module='qiskit')
before any qiskit imports in your code. This will suppress the
warning about the missing qiskit-aer and qiskit-ibmq-provider, but
will continue to display any other warnings from qiskit or other packages.
Installing Aer from Source
Clone the Aer repository.
git clone https://github.com/Qiskit/qiskit-aer
Install build requirements.
pip install cmake scikit-build cython
After this, the steps to install Aer depend on which operating system you are using. Since Aer is a compiled C++ program with a Python interface, there are non-Python dependencies for building the Aer binary which can’t be installed universally depending on operating system.
Linux
Install compiler requirements.
Building Aer requires a C++ compiler and development headers.
If you’re using Fedora or an equivalent Linux distribution, install using:
dnf install @development-tools
For Ubuntu/Debian install it using:
apt-get install build-essential
Install OpenBLAS development headers.
If you’re using Fedora or an equivalent Linux distribution, install using:
dnf install openblas-devel
For Ubuntu/Debian install it using:
apt-get install libopenblas-dev
macOS
Install dependencies.
To use the Clang compiler on macOS, you need to install an extra library for supporting OpenMP. You can use brew to install this and other dependencies.
brew install libomp
Then install a BLAS implementation; OpenBLAS is the default choice.
brew install openblas
Next, install
Xcode Command Line Tools.xcode-select --install
Windows
On Windows you need to use Anaconda3 or Miniconda3 to install all the dependencies.
Install compiler requirements.
conda install --update-deps vs2017_win-64 vs2017_win-32 msvc_runtime
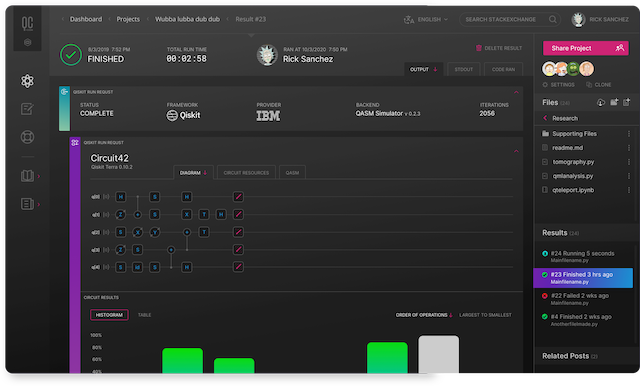
Qiskit Aer is a high performance simulator framework for quantum circuits. It provides several backends to achieve different simulation goals.
conda install --update-deps -c conda-forge -y openblas cmake
Build and install qiskit-aer directly
If you have pip <19.0.0 installed and your environment doesn’t require a custom build, run:
cd qiskit-aer
pip install .
This will both build the binaries and install Aer.
Alternatively, if you have a newer pip installed, or have some custom requirement, you can build a Python wheel manually.
cd qiskit-aer
python ./setup.py bdist_wheel
If you need to set a custom option during the wheel build, refer to Custom options during wheel builds.
After you build the Python wheel, it will be stored in the
dist/dir in the Aer repository. The exact version will dependcd dist pip install qiskit_aer-*.whlThe exact filename of the output wheel file depends on the current version of Aer under development.
Custom options
The Aer build system uses scikit-build to run the compilation when building it with the Python interface. It acts as an interface for setuptools to call CMake and compile the binaries for your local system.
Due to the complexity of compiling the binaries, you may need to pass options to a certain part of the build process. The way to pass variables is:
python setup.py bdist_wheel [skbuild_opts] [-- [cmake_opts] [-- build_tool_opts]]
where the elements within square brackets [] are optional, and
skbuild_opts, cmake_opts, build_tool_opts are to be replaced by
flags of your choice. A list of CMake options is available here:
https://cmake.org/cmake/help/v3.6/manual/cmake.1.html#options. For
example, you could run something like:
python setup.py bdist_wheel -- -- -j8
This is passing the flag -j8 to the underlying build system (which in this case is Automake), telling it that you want to build in parallel using 8 processes.
For example, a common use case for these flags on linux is to specify a specific version of the C++ compiler to use (normally if the default is too old):
python setup.py bdist_wheel -- -DCMAKE_CXX_COMPILER=g++-7
which will tell CMake to use the g++-7 command instead of the default g++ when compiling Aer.
Another common use case for this, depending on your environment, is that you may need to specify your platform name and turn off static linking.
python setup.py bdist_wheel --plat-name macosx-10.9-x86_64 \
-- -DSTATIC_LINKING=False -- -j8
Here --plat-name is a flag to setuptools, to specify the platform name to
use in the package metadata, -DSTATIC_LINKING is a flag for using CMake
to disable static linking, and -j8 is a flag for using Automake to use
8 processes for compilation.
A list of common options depending on platform are:
Platform |
Tool |
Option |
Use Case |
|---|---|---|---|
All |
Automake |
-j |
Followed by a number, sets the number of processes to use for compilation. |
Linux |
CMake |
-DCMAKE_CXX_COMPILER |
Used to specify a specific C++ compiler; this is often needed if your default g++ is too old. |
OSX |
setuptools |
–plat-name |
Used to specify the platform name in the output Python package. |
OSX |
CMake |
-DSTATIC_LINKING |
Used to specify whether or not static linking should be used. |
Note
Some of these options are not platform-specific. These particular platforms are listed because they are commonly used in the environment. Refer to the tool documentation for more information.
Installing Ignis from Source
Clone the Ignis repository.
git clone https://github.com/Qiskit/qiskit-ignis.git
Cloning the repository creates a local directory called
qiskit-ignis.cd qiskit-ignisIf you want to run tests or linting checks, install the developer requirements. This is not required to install or use the qiskit-ignis package when installing from source.
pip install -r requirements-dev.txt
Install Ignis.
pip install .
If you want to install it in editable mode, meaning that code changes to the project don’t require a reinstall to be applied:
pip install -e .
Installing Aqua from Source
Clone the Aqua repository.
git clone https://github.com/Qiskit/qiskit-aqua.git
Cloning the repository creates a local directory called
qiskit-aqua.cd qiskit-aquaIf you want to run tests or linting checks, install the developer requirements. This is not required to install or use the qiskit-aqua package when installing from source.
pip install -r requirements-dev.txt
Install Aqua.
pip install .
If you want to install it in editable mode, meaning that code changes to the project don’t require a reinstall to be applied:
pip install -e .
Installing IBM Quantum Provider from Source
Clone the qiskit-ibmq-provider repository.
git clone https://github.com/Qiskit/qiskit-ibmq-provider.git
Cloning the repository creates a local directory called
qiskit-ibmq-provider.cd qiskit-ibmq-providerIf you want to run tests or linting checks, install the developer requirements. This is not required to install or use the qiskit-ibmq-provider package when installing from source.
pip install -r requirements-dev.txt
Install qiskit-ibmq-provider.
pip install .
If you want to install it in editable mode, meaning that code changes to the project don’t require a reinstall to be applied:
pip install -e .
Ready to get going?…
Qiskit from the ground up
Learn how to build, execute, and post-process quantum circuits with Qiskit.
Start learning QiskitDive into the tutorials
Find out how to leverage Qiskit for everything from single-circuits to full quantum application development.
Qiskit tutorials